How To Update Your © Copyright Year on Your Website
There is no real hard-and-fast rule for how and when to make certain technical changes to your website, including the copyright year. But, since it is a new year (or maybe you are just noticing it has a previous year), you should plan on updating your year on the website to keep it looking fresh and as current as possible.
Yes, visitors really do notice these small details.
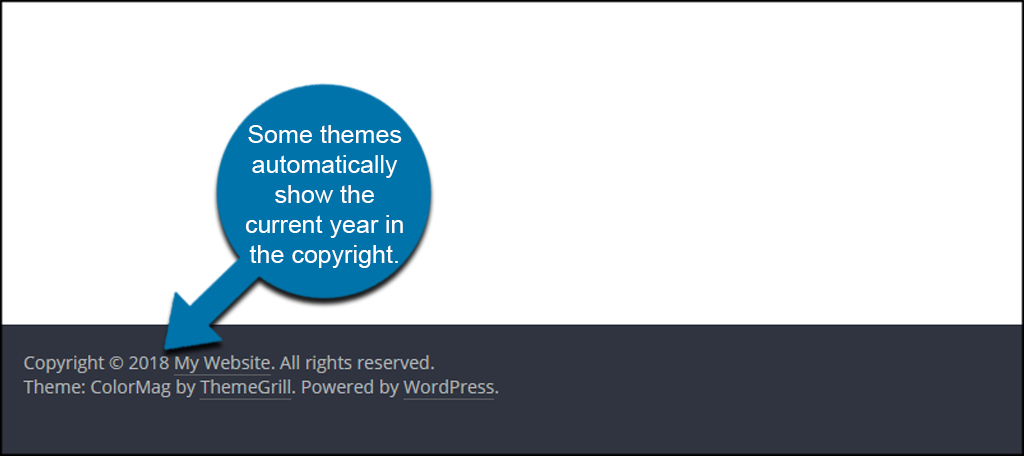
Every website has a footer area to the bottom of every page. Generally, it’s the same for each page with slight variations possibly on singular landing pages as needed depending on your design.
And, on each and every website’s footer you’ll likely see the © copyright symbol, the year, and the website (aka business) name of that website.
If you regularly add new content or edit the existing content, you should probably update the year in your copyright notice at the beginning of each new year.
While you’re at it…
I highly recommend updating (or adding to) your footer area with any or all of these:
- Copyright Notice
- Links to your policies
- Your contact details
- Your Location (address, city and state or just city and state)
- A Location map (if you are a physical business)
- Social media links
- A newsletter sign-up box
- Links to pages that are not in the main navigation
Quick Fix: How to change the copyright year in your website’s footer
Option 1: Update the copyright year in your footer via your theme customizer
To go this route, simply follow the these directions:
- Log into your WordPress dashboard
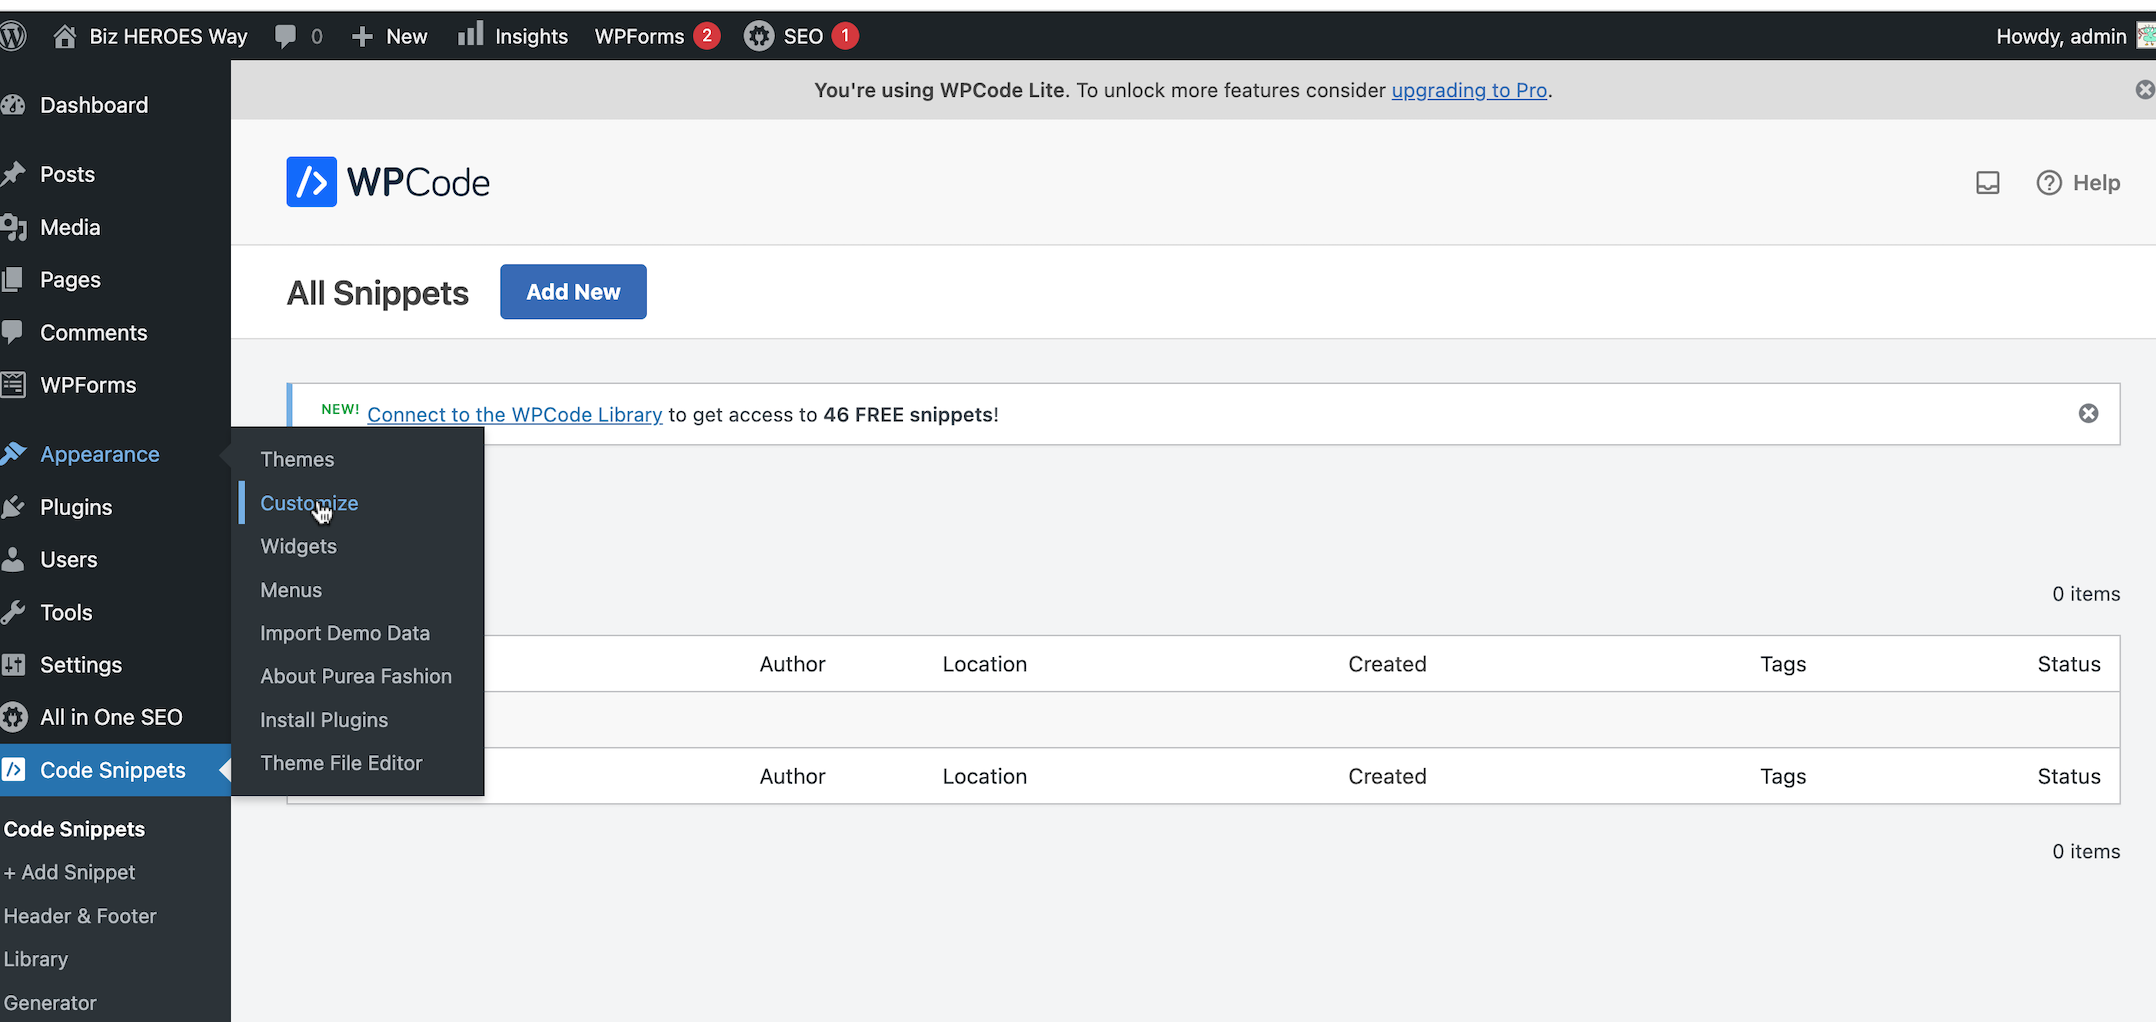
- Go to the side admin panel and click on Appearance
- Click Customize
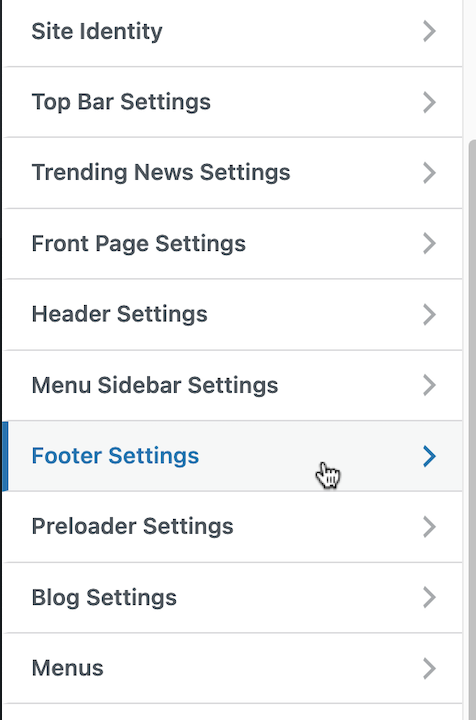
- This will take you to a new editing page. Find and click Footer
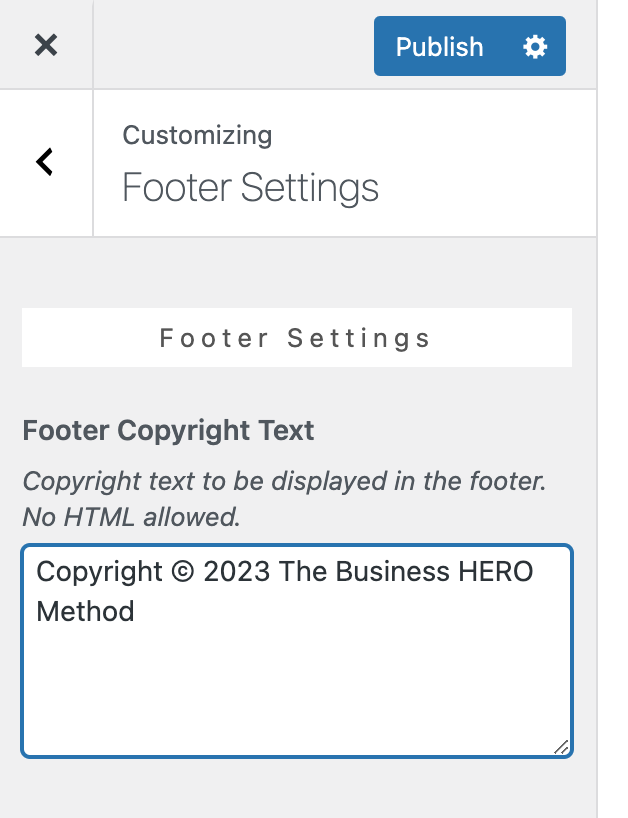
- Click Footer Layout
- Replace the year with the shortcode: [ fl_year ]
- Important: When copying and pasting the above shortcode, be sure to remove the space before ] and after [ for it to work correctly.
Option 2: Update the copyright year in your footer via your Theme Layout
If you’ve purchased your theme and have all the files available on your admin panel in WordPress, then you can follow these directions:
- Log into your WordPress dashboard
- Go to your site’s theme > Theme Layouts
- Click Footer template or Footer file
- Click the footer file
- Replace the year with the shortcode: [ fl_year ]
- Important: When copying and pasting the above shortcode, be sure to remove the space before ] and after [ for it to work correctly.
Option 3: Update the year in your footer via your Footer Menu
If the year is housed in your footer menu widget, you can update it this way:
- Log into your WordPress dashboard
- Go to Appearance > Menu
- Select your Footer Menu from the dropdown
- In the appropriate page, replace the year with the shortcode: [ fl_year ]
- Important: When copying and pasting the above shortcode, be sure to remove the space before ] and after [ for it to work correctly.
How to AUTOMATICALLY Update Your Copyright Year on Your Website
Copy & paste:
<script type="text/javascript">
  document.write(new Date().getFullYear());
</script>
Copy & paste:
© 2010<script>new Date().getFullYear()>2010&&document.write("-"+new Date().getFullYear());</script>, Company.
Copy & paste:
<?php echo date("Y"); ?>
Copy & paste:
© <?php
$fromYear = 2008;
$thisYear = (int)date('Y');
echo $fromYear . (($fromYear != $thisYear) ? '-' . $thisYear : '');?> Company.
When should I change the copyright year on my website?
Again, there are no real hard-and-fast rules for how and when to make certain technical changes to your website, including the copyright year. But, if you regularly add new content or edit the existing content, we suggest that you update the year in your copyright notice each year to keep it looking fresh and as current as possible.
Read Articles About Small Business Marketing
 Read more +12 December 2024 in Blog, Link Building, Page rank, Website
Social Sales Best Practices for Social Media Selling
 Read more +18 December 2023 in Blog, Content, Google Analytics, Online Tools, Page rank, Pagerank, SEO, Website
How To Index a Website Page: Google Indexing – Crawl vs Index vs Rank
 Read more +24 November 2023 in Blog, Link Building, Page rank, Website